Snap-kits


| By : Prinz William |
 |
For lazy people. Or for absolute beginners.
And it's not complicated. In 5 minutes you have a completed model and you can watch television again... |
Hey, your granny can do it - on her own - with her eyes closed - and the hands tied on her back - in her sleep - and singing Pavarotti - all this at the same time. And in a good day she feeds the cat as well at the same time.
Me, I'm too chicken to make some real car-models, though I've a big stock of them and several under construction. You see, real car-models need to be painted, preferably sprayed. This involves a lot of work and is not easy and until now, I never got away with it. It's a question of learning I guess...
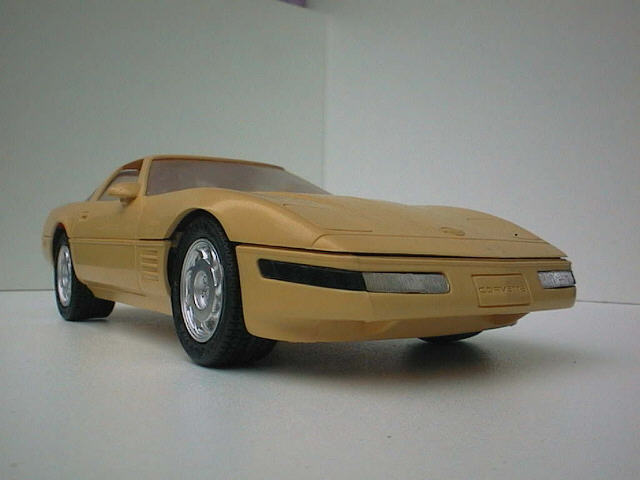
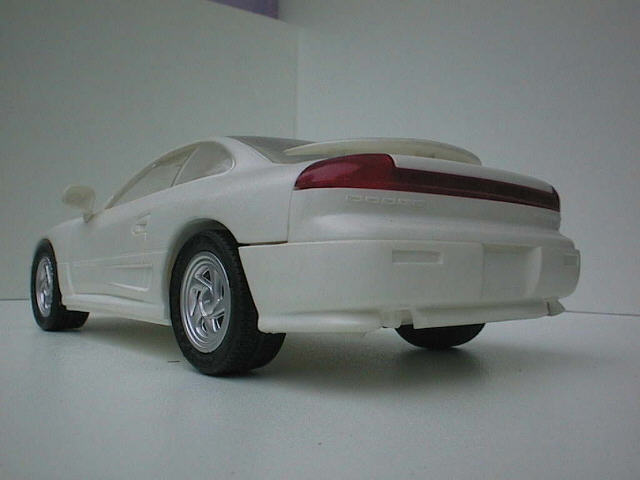
Currently I have three cars in my possesion.

Do I play with them?
Well, they're the meanest looking vrooming machines around. Driving them around on my desk is good for my ego
and my little 3 years old nephew just loves it (he only has a small Matchbox Ferrari so I can beat him any time).
One day I'm gonna drive the real thing, watch my taillights... Yeah.
How? What? When? Will it make me more attractive to woman?
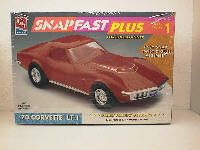 This is the box.
You can find them in any model-shop. AMT carries a range that's slowly getting bigger and bigger.
Other brands offer them as well, but under another snap-name. Lindberg has a '80 T/A (1/24) in
their Snap-fit range. Monogram has a '78 T/A (1/32) in their Snap-Tite range. But AMT has
the biggest choice for the moment, they even offer some impressive 4 wheel drives.
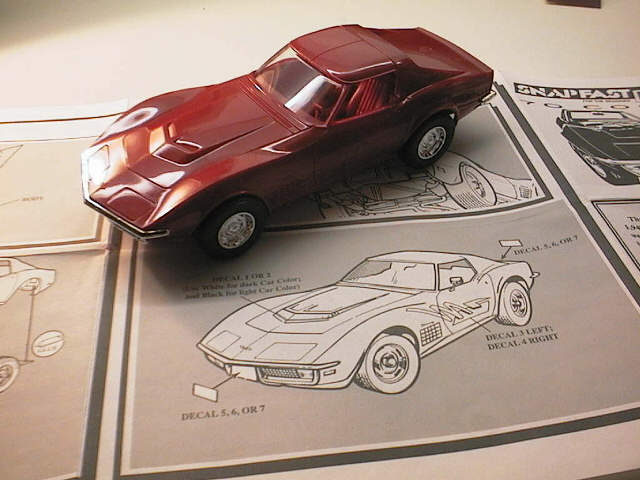
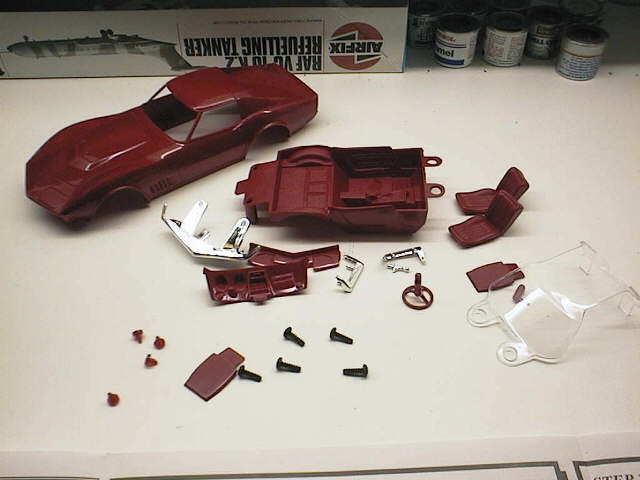 These are the parts.
After removal from the plastic trees. And after some gently cleaning up with a knife (to remove
some unwanted plastic traces from the trees).
If you wish you can buff up the plastic to make it shine like a mirror. Tamiya has 'Polishing Compound' on
offer that does the trick marvelous. But straight from the box (as mine) is shiny enough for me. However
after some years, some buffing up is advised...
 The wheel is kicked in place.
The first problem encountered. After clicking the wheels into the tyres (very easy) the wheels
are put on the steel axles. The fit is very very tight and I had to make use of a hammer. Use
an handkerchief to not damage the plated wheels.
Another tight fit was the shifter when fitted to the center console of the interior. I had to thin it a
little bit down so it could fit in the hole. Don't thin it too much, or the fit will be too loose.
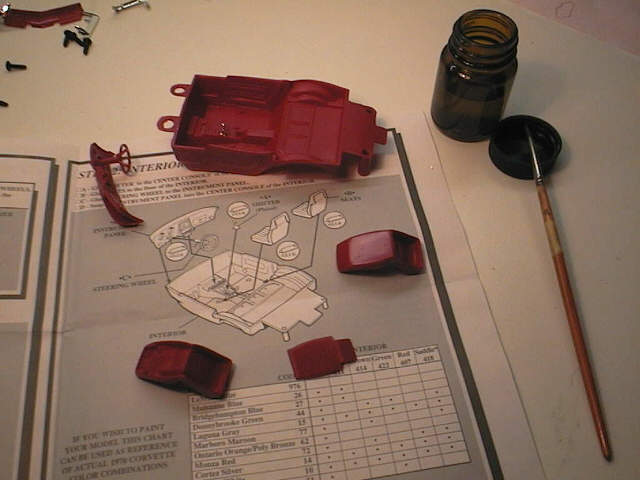 Glue?
Glue?
I was a litlle surprised to find I had to use some glue on this kit. All other Snap-kits I've made never needed
any glue. But the box says 'Easy Snap, Twist and Glue assembly', so I really can't complain.
You need to glue the back of the seats to the seats. This is not mentioned on the plan, but the parts
are there, so why not use them? And you need glue to keep the seats in their place too.
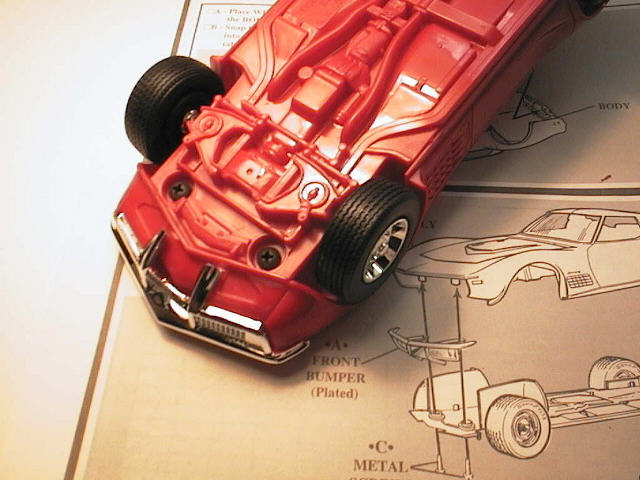 Turn those screws...
The body is mated with the chassis with two (however, there are five screws in the boxs) screws.
You have to click the backside of the chassis into the body and then put the 2 screws into their
place on the frontside of the car. Dead easy.
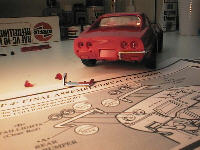 The last bits.
Click the four taillights into their place and the small bumpers. The right bumper had a tight fit but with a little
pushing it snapped into place.
It's a shame there are no side-mirrors. More car-snap-kits lack these.
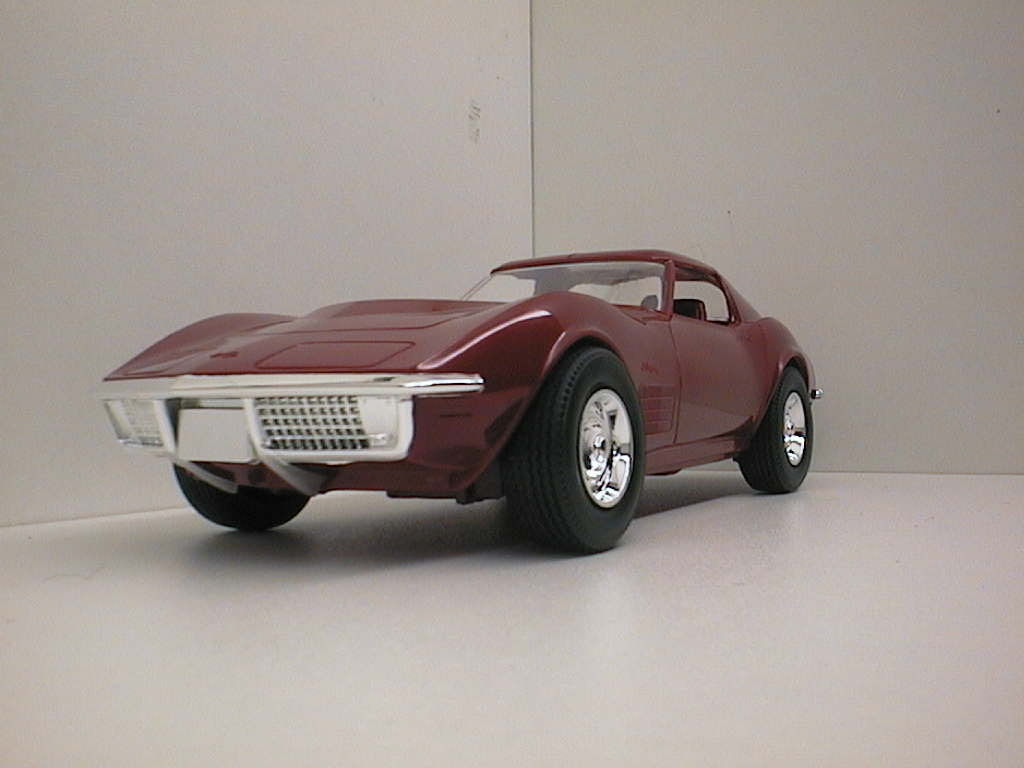
 Et voilà...
Another Corvette to squeeze into the garage (and another Corvette to keep clean).
If you want to go all the way, you can dress it a little bit up with the decals (those water-stickers). You have some flashy stripes and the choice between three groovy licence-plates. Enough to be cool.
I prefer not to use them, I'm afraid they spoil the model a little bit.
(Note the side-mirrors on the plan - sadly they're not in the kit!)
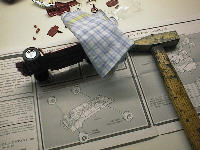
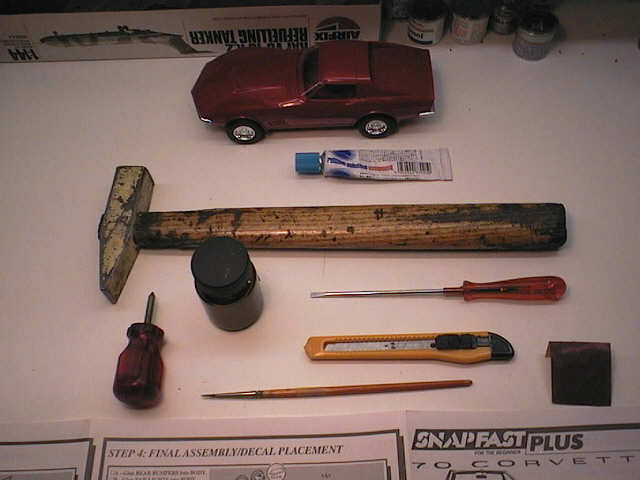 All those tools...
It looks heavy (especially the hammer), but they're hardly used. Between the car and the hammer
you can see the 'Polishing Compound' from Tamiya.
My choice of glue is liquid glue. It's easy and doesn't leave many traces. Take a simple brush
to put some (not much) glue on the mating surfaces. Don't wait to long to 'mate' them, because
this glue really dries in a wink of an eye. Another way is putting the two parts together (without glue)
and then put some glue with the brush on the joint - this is the professionel way (but use a small
brush).
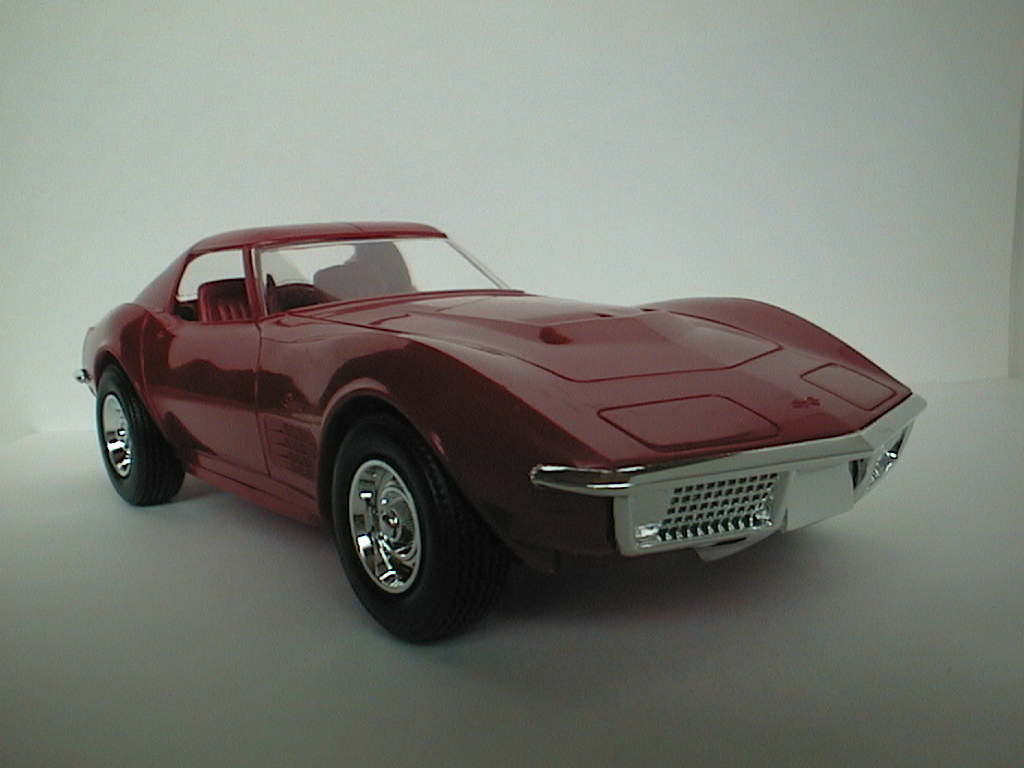
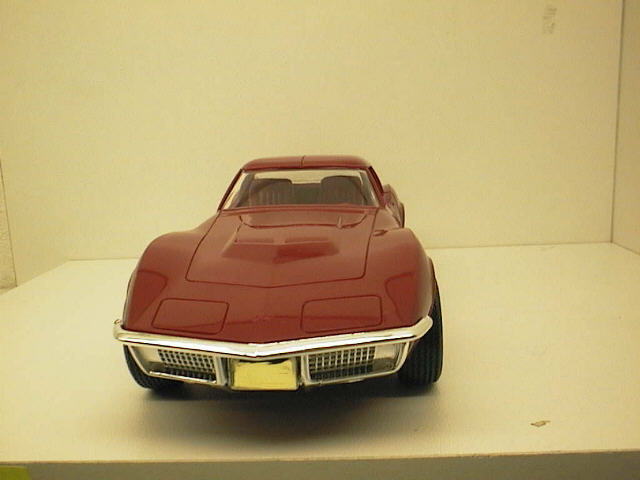 Doesn't she look gorgeous?
All in all I needed 1 hour to get this thing on my shelves. It took that long because I spent more
time making photos of it than modelling. You can do it in 30 minutes if you want, but
modelling is not an issue of time. Take your time, just like with the ladies.
Alright?
Some 1024 x 768 images?

Impressive. Now bring the babes.


|
the Pontiac Firebird Wing :
Pamela Sue -
Mylène -
Franka -
Firebird Trips -
Firebird Links
the Music Wing : Jesus & Mary Chain - John Mellencamp - Mylène Farmer - INXS - Neon Judgement the Scale Model Wing : My Plastic - Dads Plastic - Guide - Plastic Gatherings - Links to Plastic the Cool Clickings Wing |
e-mail me..
©1998-2004 Eazyprinz |